Import CSV file Procedure

Data import functions provide access to data from files, other applications and external devices.
Here we'll look import procedure, where you will learn about the BITPLUS PayMaster data model, how to prepare your data for import, and how to use the tool to help you import your data. You can quick start your BITPLUS PayMaster implementation by importing data from any program that can save data in the CSV (comma-separated values) format, such as Excel. Clean data in BITPLUS PayMaster becomes valuable information for your business.
You can import as many records as allowed into BITPLUS PayMaster from an existing data source. The number of records you can import depends on your permissions and the type of data you’re importing.
The Data Import Wizard provides a unified interface that lets you import data for a number of standard BITPLUS PayMaster objects, including Country, Province, City, Department, Employees, Remuneration, Employee Separation and so on. You can use the Data Import Wizard to import as many records as records at a time.
Start the wizard.
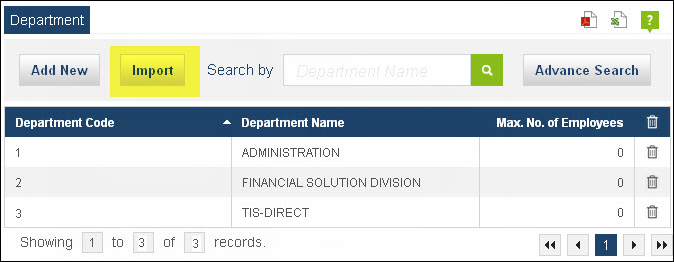
Before you can import data into BITPLUS PayMaster, use your existing software to create a data export file. An export file contains all the information you want to import.
Your export file can contain a mixture of new records and updates to existing records. You’ll choose how records are matched to avoid duplication. For example, you can choose to match employees by Payroll No or by Employee No. If you choose to match by Employee No, then the ontact already in BITPLUS PayMaster will be updated if a record in your imported data has the same Employee No. However, if records have the same Payroll No but different Employee Id, the records will give error.
Review data you will import to ensure that it is more up-to-date than what is already in BITPLUS PayMaster. Compare your data fields with the BITPLUS PayMaster fields you can import into, and verify that your data will be mapped as per BITPLUS PayMaster import template.
Note
If you are the administrator and are importing for multiple users, combine export data from multiple sources into a single comma delimited text file (.csv) using Excel. BITPLUS PayMaster strongly recommended you to not import same entry option file together i.e. if you want to import department master file from 2 system, you should alternatively import the file.
You can use the Data Import Wizard to import as many records as records at a time. Before you can import data into BITPLUS PayMaster, use your existing software to create a data export file. An export file contains all the information you want to import.
Map your data fields to BITPLUS PayMaster Import csv template.
The Data Import Wizard gives import template format for import data to map of your data fields to standard BITPLUS PayMaster data fields. Use this import template to avoid errors, duplication of data, and frustration by preparing your data for import. Import file and Import template file format should be matched to each other. Unmatched file or Unmapped fields are not imported into system.
Choose the data file that you want to import.
You can specify your data file by clicking on the "Browse" button and selecting the file. Click on "Attach File" button to attach and list the all data of the file into BITPLUS PayMaster application.
Specify whether you want to add new records to BITPLUS PayMaster, update existing records, or add and update records simultaneously. In each import file template there is a column, starting with "Old" word, always lays at last position are consider for update the record. When value exist in this column system are used to update the existing records of that value with the new data.
Review the import data and start your import.

Review your import data information from the list. Import Data List shows all the import data. List shows Unclean, Dirty and error data in red colour with error description. BITPLUS PayMaster recommends you import using a small test file first to make sure that you have prepared your source data correctly.
Click Start Import.
Click on "Import" button to start import data procedure. BITPLUS PayMaster import functionality imports only clean data.
Note:
Only administrators or user having rights to access to the Import Data Procedure. If you’re not an administrator, you should have user rights to access the Import Data Procedure.
Use the following best practices to keep your BITPLUS PayMaster data clean, consistent, and complete.
Validation RulesMap your data fields to BITPLUS PayMaster Import csv template.
Improve the quality of your data using validation rules. Validation rules verify that the data a user enters in a record meets the standards you specify before the user can save the record. A validation rule can contain a formula or expression that evaluates the data in one or more fields. Validation rules also include an error message to display to the user when the rule returns a value of “False” due to an invalid value.
- After you have defined validation rules:
- The user chooses to create a new record or edit an existing record.
- The user clicks Save.
- All validation rules are verified.
- If all data is valid, the record is saved.
- If any data is invalid, the associated error message displays without saving the record.
- The user makes the necessary changes and clicks Save again